
2. Quickstart Guide
This section shows the basic steps for creating a new project and encoding files. There are also a few example projects included that can be opened and encoded immediately. Available features are described in depth in later sections. A separate document, the User Guide PDF, explains all of the Encoder command line options, as well as other topics such as the Loader API, and is recommended to read as well. If you are using the full version of the Encoder rather than the evaluation and have not yet licensed the product, the section Licensing the Encoder will explain that process.
Having started the application from the item provided in the Windows Start Menu, the following window will appear:
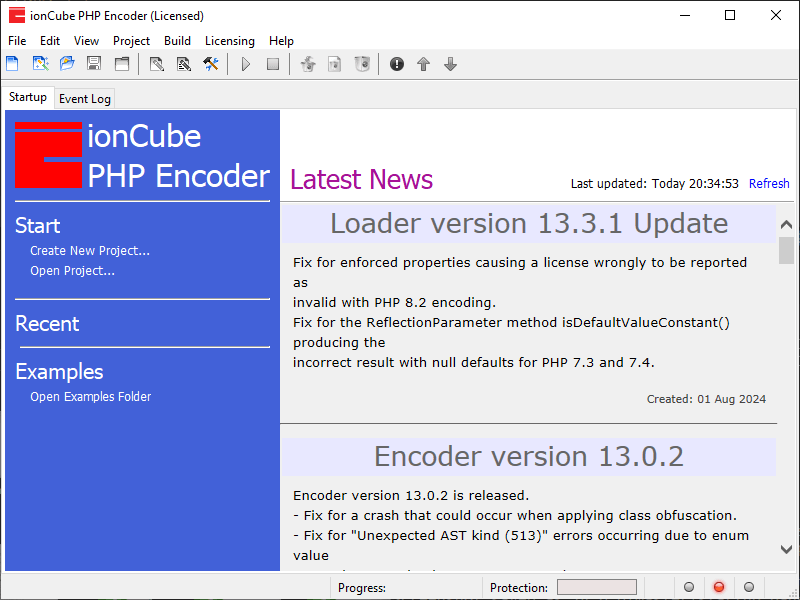
Note: News articles and the default window size will vary.
Creating a new Encoder project (method 1)
An Encoder project stores all the settings necessary to encode a PHP project in the way that you want. Typically there would be one Encoder project for each PHP project, or variation of a project, that you have.
To create a new project, either click the Create New Project... item
on the left of the startup window, choose the File/New Project... menu
item or click the first toolbar icon
 .
An unconfigured project will
be created and the Project Settings dialog will soon appear. The
Encoder has many features, and the available project settings are
grouped on different tabs according to their function. For now we will
just configure the options present on the Quickstart tab, which
allows for quick setup of the minimum settings required to encode
a project.
.
An unconfigured project will
be created and the Project Settings dialog will soon appear. The
Encoder has many features, and the available project settings are
grouped on different tabs according to their function. For now we will
just configure the options present on the Quickstart tab, which
allows for quick setup of the minimum settings required to encode
a project.
The Quickstart tab
With the project settings dialog open, first select the Quickstart tab if it is not currently active. This tab combines the minimum settings that need to be configured for a project.
Setting the project source files folder
Enter the location of your project source files in the Project source folder field. You can also use the Browse... button to browse for a location.
Setting the target folder name and location
Click or tab-into the Target folder name field. If the field is empty it will then be auto-filled with the name of the source folder set previously. This is the name of the folder where encoded files will be created. It can be changed if you wish.
The location of the target folder should also be set in
the Location of project target folder field, for example,
C:\encoded-projects
Selecting the Encoder version
In addition to the current version, the previous two major versions of the Encoder are also provided. This gives you flexibility in case you want to produce older generations of encoded files. Selecting Current ensures that the project will be encoded using the latest Encoder version of the GUI that opens the project, i.e. a newer Encoder will be used if opening the project with a newer GUI version. Alternatively, an explicit version can be selected instead. This is useful if wanting to encode with a specific Encoder version even after upgrading the product, allowing you to choose when to move to a project to a newer Encoder, independently to the GUI.
PHP language range
Finally, you should select the minimum and maximum PHP runtime version you wish to support for the generated files. The selection determines which encodings will be performed, with files in some cases containing a Bundle of more than one encoding. Below the selection, the GUI shows which runtime versions of PHP are supported by the selection.
The default is based on saved preferences, and in version 15 will default to PHP 8.4 if this is the first installation of the software on the machine.
The minimum version should be chosen to be no lower than the PHP language version used by the source files. For example, files cannot be encoded for PHP 7 if they use syntax only available in PHP 8.
The maximum version sets the highest PHP version your files are
expected to run on. While files may still work on higher PHP versions, this
setting ensures no unnecessary encodings are added. For example, selecting
PHP 7.4 would exclude support for PHP 8.
Choosing --- ensures files are
encoded up to the maximum PHP version supported by the current
product version.
If files are re-encoded with a future product version, --- ensures
any required encodings for newer PHP versions are included.
The maximum supported runtime version may show as higher than that selected. This would be if the ionCube Loader runtime is able to process files encoded for an older version of PHP, such as the ionCube Loader for PHP 8.4 being able to process files encoded for PHP 8.2 or 8.3 as well as PHP 8.4.
-
Example 1: Your source code uses PHP 7 syntax, and your users will have PHP 7.2 but not PHP 8. You could set the range to PHP 7.2-7.4, producing files that run on PHP 7.2 or 7.4, but not PHP 8, with a single encoding in each file.
-
Example 2: Your source code uses PHP 7 syntax, is compatible with PHP 8, and must run up to PHP 8.4. You could set the range to PHP 7.1-8.4, producing a bundle with encodings for PHP 7.1, 8.1, and 8.2. The Encoder is aware that files encoded for PHP 7.1 can run up to 7.4, and that files encoded for PHP 8.2 can run up to 8.4.
-
Example 3: Your source code uses PHP 8 syntax, and you want to always encode for the highest PHP version supported. You could set the minimum to 8.1 and maximum to
---. With future Encoder versions, any necessary encodings for newer PHP versions will be added automatically without changes to the project settings being required.
As a guide for choosing a minimum PHP version, estimated usage of different PHP versions is available at w3techs
Final steps
The steps above are the minimal steps for setting up a project. Before moving on to encoding the project, take a moment to look at the Source tab.
If the source folder exists, the Project files section
on the Source tab will show your project files as a hierarchical
tree, with different icons to indicate how the Encoder will process each file
and folder. Files that match the default PHP extensions will be
encoded ( ), others will be
copied (
), others will be
copied ( ), and any files or
folders matching the default excluded item patterns will not be
processed (
), and any files or
folders matching the default excluded item patterns will not be
processed ( ). If you
right click on files and folders in the tree,
a popup menu is displayed with actions to change how the Encoder will process the item. If multiple
items in the tree are selected, an action will be applied to all selected items.
The icon buttons above the tree can also be
used for this purpose.
). If you
right click on files and folders in the tree,
a popup menu is displayed with actions to change how the Encoder will process the item. If multiple
items in the tree are selected, an action will be applied to all selected items.
The icon buttons above the tree can also be
used for this purpose.
Clicking OK will close the project settings.
The title bar will now be similar to the following.

The project has not yet been saved so the titlebar shows that the project is untitled, and
the * character indicates that the project has been modified. The PHP version to be
used for encoding is also shown to help reduce the chance of opening a project configured for the wrong PHP version,
which might happen if you have similar projects set with different versions.
The title also confirms that the software is licensed.
Project creation (method 2) - the project Wizard
An alternative to the process above is to use the project Wizard  .
This also collects the minimal information required to have a usable project, and having used the Wizard,
the project settings dialog can be opened to configure other settings as required.
.
This also collects the minimal information required to have a usable project, and having used the Wizard,
the project settings dialog can be opened to configure other settings as required.
Building (encoding) your project
You are now ready to build your project. Choose
the Build/Build (Rebuild) menu option, press the F5 key, or click the Start Building
toolbar icon  . The precise behaviour of the build option
can be set within project settings on the Target tab, and by default will do a full rebuild by first
deleting the target folder if it already exists. Other options are to replace existing
files in the target folder without deleting (merge), or only to process files where
the source file either is new, or has a timestamp newer than that of the target file (Update).
A backup option also exists that renames any existing target before creating a new one.
The exact behaviour is also indicated in the name of the Build menu item.
. The precise behaviour of the build option
can be set within project settings on the Target tab, and by default will do a full rebuild by first
deleting the target folder if it already exists. Other options are to replace existing
files in the target folder without deleting (merge), or only to process files where
the source file either is new, or has a timestamp newer than that of the target file (Update).
A backup option also exists that renames any existing target before creating a new one.
The exact behaviour is also indicated in the name of the Build menu item.
Single PHP version encoding
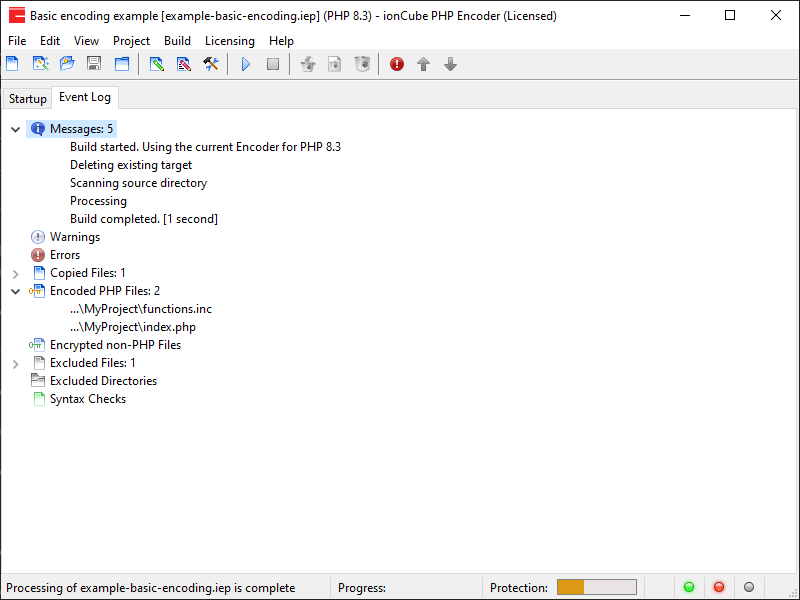
The screenshot below is an example where encoding was for a single PHP version. Depending on the PHP language version, this may produce files that run only on that version, or a range of PHP versions may be covered with the single encoding. Files will be processed after starting a build, and the first status indicator icon in the bottom right corner of the window will turn yellow while the Encoder is running. The Event Log tree in the main window will show how items have been processed as well as any warnings or errors. The encoding indicator will be blinking green if encoding was successful (example below), or blink red if there were errors. Clicking the encoding indicator returns it to solid green; this can be done if desired but is merely a visual change. Once building is complete, your encoded files can be tested, packaged or deployed as required.
Multiple PHP version (Bundle) encoding
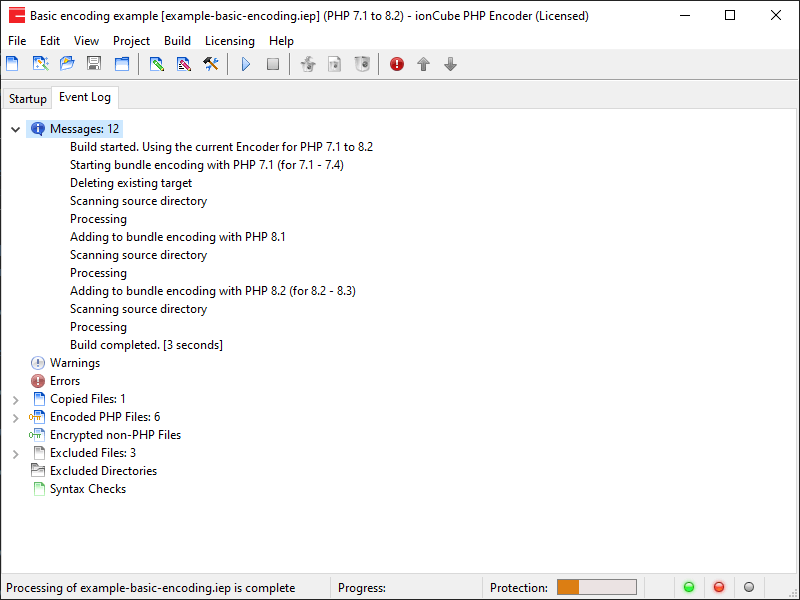
The screenshot below is an example of a bundle encoding, where files contain several encoded versions of a file to cover a wide range of target PHP versions. In this example, encoding was selected to cover PHP 7.1 to 8.4, which bundled encodings for 7.1, 8.1 and 8.2 into each file. Where possible, the ionCube Loader runtime component uses complex techniques to support running of files compiled for earlier versions of PHP on a newer version, such as the encoding for PHP 8.2 being able to run on 8.2, 8.3 and 8.4, and possibly even newer versions in the future. This is one of the unique advantages of ionCube over alternatives that require an encoding for each new version of PHP, and new encoded files to be shipped to a user when a new version of PHP is released.
Now that you have completed the Quickstart guide, a good place to continue reading is with the project settings. The PDF User Guide is also a useful source for reference. As well as describing every Encoder command line option in detail, which may be useful even though you are using the GUI, the licensing features of the Pro and Cerberus Encoder are given. The Loader API is also explained.